
In this article, I will walk you through with the steps on how we can Migrate Postgres Database running on EC2 to AWS RDS Database using Database Migration Service [DMS].
Postgres Database
PostgreSQL is a powerful, open-source object-relational database system with over 30 years of active development that has earned it a strong reputation in terms of reliability, feature robustness, and performance.
https://www.postgresql.org/
AWS RDS Postgres
Amazon RDS for PostgreSQL gives you access to the capabilities of the familiar PostgreSQL database engine. This means that the code, applications, and tools you already use today with your existing databases can be used with Amazon RDS. Amazon RDS for PostgreSQL currently supports PostgreSQL 9.6, 10, 11, and 12.
https://aws.amazon.com/rds/postgresql/
AWS DMS
AWS Database Migration Service (AWS DMS) helps you to migrate databases to AWS quickly and securely. The source database remains fully operational during the migration, minimizing the downtime to applications that rely on the database.
Aspects we are going to cover in this article:
- EC2 Postgres is already in place with a sample database along with a security group for EC2
- Setup AWS RDS Postgres Instance
- Prepare DMS Replication Server
- Configure the Source end Destination Endpoints
- Create and Run a Task for Database Migration
Prerequisites (EC2 Postgres):
- Adding the IP address of AWS DMS replication server on pg_hba.conf
- Set wal_level = logical on postgresql.conf
- Set max_replication_slots [based on your Replication Tasks] default = 10
- Set max_wal_senders for concurrent tasks [default = 10]
- Set wal_sender_timeout default is 60 [you can tune this if needed based on requirements, the recommended parameter is “0”]
- Create a custom user for replication with superuser role
Creating a PostgreSQL database instance in Amazon RDS
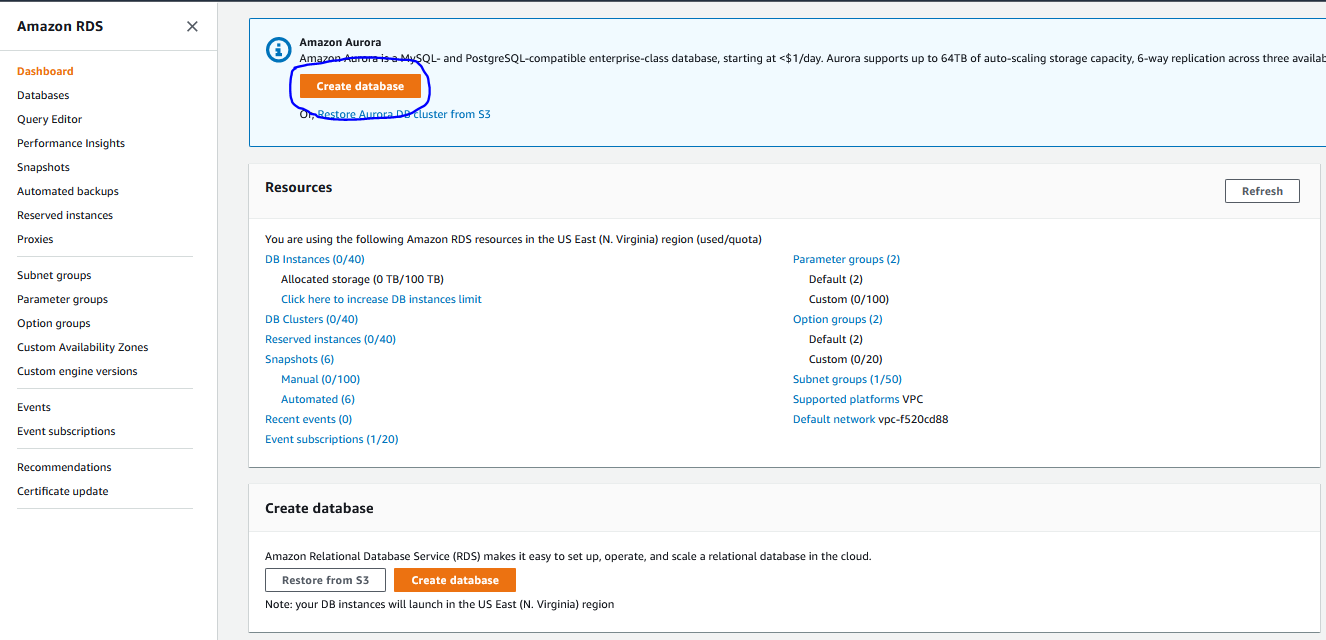
On AWS Management Console select Amazon RDS -> Create Database
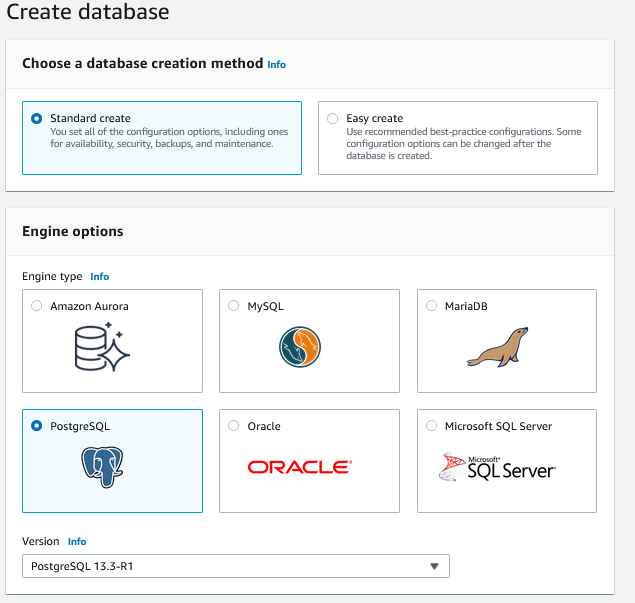
On the create database home screen, select the correct database creation method: you will find two methods which are “Standard” and Easy Creation”. The description of both of will be given for you to make the right choice in choosing the standard method.
Select “Postgres” as your database.
On the drop-down version, you will get list of the available versions. Here we are choosing 13.3-R1.
There will be two templets available depends on your work load you can choose either “Production” or “Dev/Test”
Settings
DB instance identifier: Your RDS Instance name
Credentials Settings
Provide your Master username & Master password details or you can choose auto generated password.
DB Instance Class
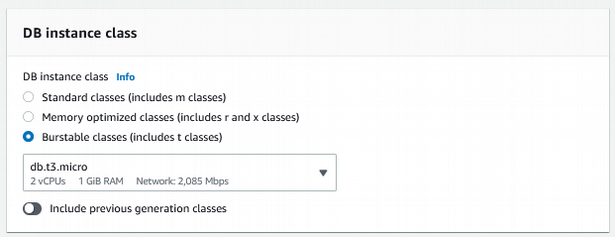
On this version, you will get three choice of classes each has its own computational needs depending on the work load. You can also choose one among one of those.
Standard
Standard instances provide a balance of computing, memory, and network resources, and is a good choice for various database workloads.
Memory optimized classes
Memory optimized instances can accelerate the performance for workloads which process large data sets of memory.
Burstable classes
Burstable performance instances provide a baseline level of CPU performance with the ability to burst above the baseline.
Based on your IOPS you can select better storage solution, here we are keeping it as default to 20GB.
By enabling the “Storage autoscaling” feature it can help you opt for disk expansion if it is close to a specified threshold.
For availability & durability, it is always recommended to create standby instance.
Creating a standby in a different Availability Zone (AZ) to limit data redundancy, eliminate I/O freezes, and minimize latency spikes during system backups. Notable point is this standby instance adds additional cost same as your primary instance.
Connectivity
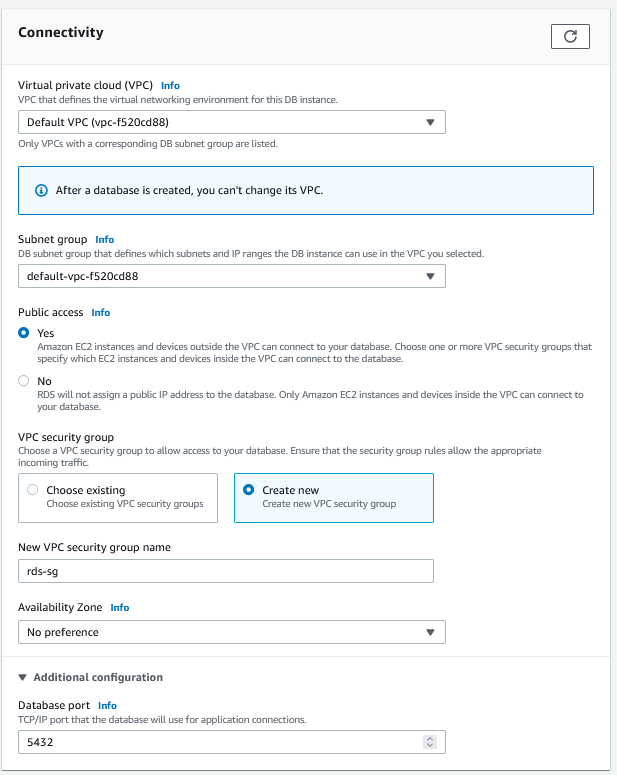
Defining your VPC and subnet group details. We are going to use default VPC and subnet. If you would like to access your RDS instance from EC2 instance or any client tools like pgAdmin you can select the public IP address option on Public Access.
Next, we need to choose or create a security group for this RDS Instance. Let’s create dedicated security group for our RDS [rds-sg]
In the additional configuration page, the default option that will be available is the postgres port that can be used for connecting applications.
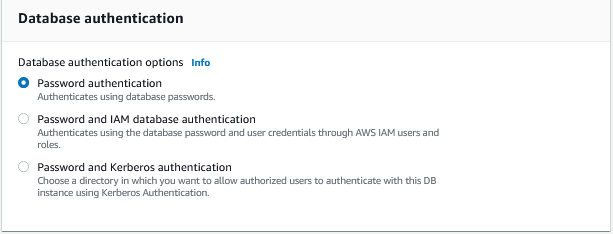
We are the making database authentication as password based.
Additional configuration
This is the place where we are going to mention our initial database name, DB parameter group that defines the configuration settings, that you want applied to this database along with backup, encryption, and performance insights by keeping it all to a default value.
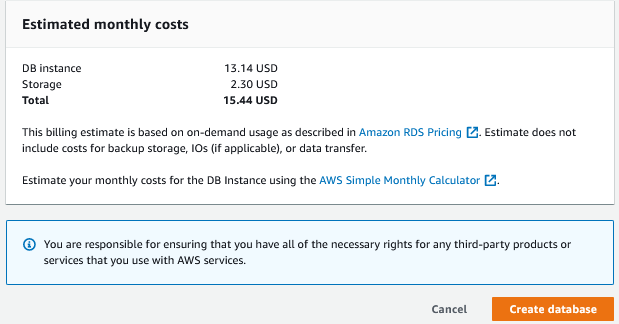
In the end, it is possible for you to get all the details at an estimated monthly cost. Next, click on “Create database” to get started with RDS Instance creation.
You may have to wait for a while to get the setup initialized. It will create a database instance with one initial backup. Once the Status is “Available” our instance is ready.
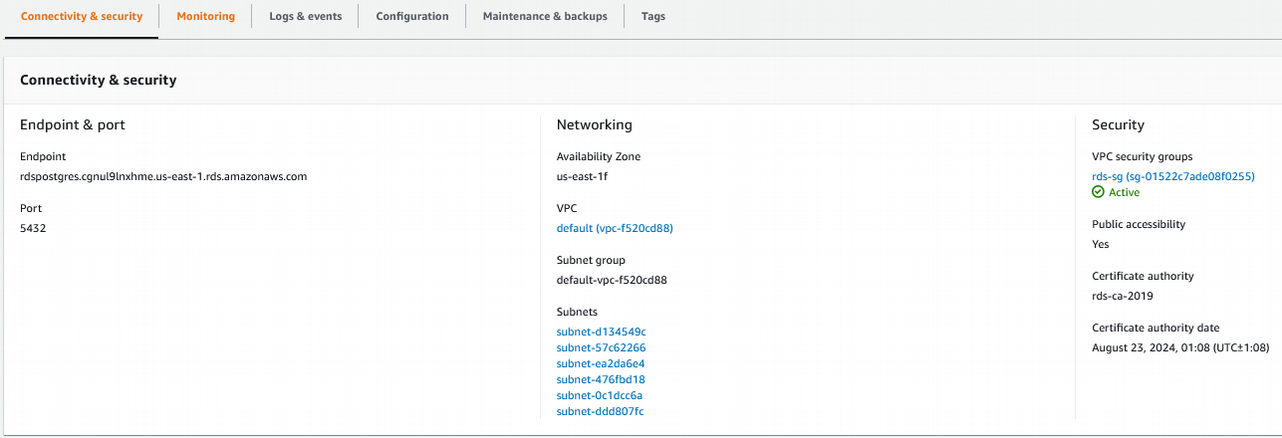
By clicking on the “rdspostgres” DB identifier you will get all the instance related details such as the connectivity details with the endpoint name and port number.
Security group rules
By default, it will add your IP address from where you have created your RDS instance. We will add the additional rules later.
The CloudWatch monitoring tab will have various instance related metrics like CPU unitization, DB connections with Free Storage Space and Free memory details with Read/Write IOPS.
On the Log and events tab, we can see the recent events and log details:
We can explore recent logs by selecting it with the view option:
The configuration tab will have all the configuration details of the particular instance.
Maintenance & backup details will have all the backup related information along with the snapshot details. We can customize the snapshot and restore it here.
Finally, let’s try to connect our RDS instance using the pgAdmin tool. Go to connectivity & security and copy the Endpoint name.
Goto pgAdmin Tool
Summary
In this article, we have seen how to create the RDS Postgres instance with all the prerequisites for Database migration using the DMS Tool. In the next part, we will see how to create Replication Server and Source, Destination Endpoints with Replication Task.


