
Table of Contents
In the last article, we covered how to setup and configure RDS Postgres Instance and tested connectivity using the client tool pgAdmin. This article will walk you through the steps on how we can Migrate Postgres Database to AWS RDS Database using Database Migration Service [DMS].

AWS DMS Replication Instance
When you create an AWS DMS replication instance, AWS DMS creates it on an Amazon EC2 instance in a virtual private cloud (VPC) based on the Amazon VPC service. You can then use this replication instance to perform your database migration.
AWS DMS uses a replication instance to connect to your source data, read it and format the data for consumption by the target data store. A replication instance also loads data into the target data store. Most of this processing happens in the memory. However, large transactions might require some buffering on disk. Cached transactions and log files are also written to the disk.
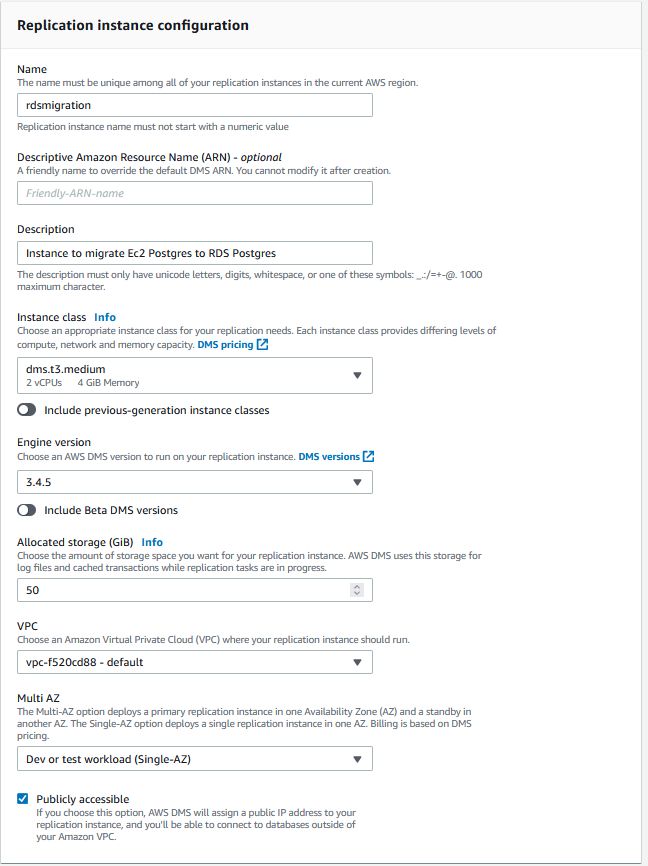
On the AWS Management console, go to Database Migration Service in the home screen select Replication instances and create a replication instance.

There are certain mandatory values we need to define to create a replication instance:
Name [The name must be unique among all your replication instances in the current AWS region.]
Instance class [Choose an appropriate instance class for your replication needs. Each instance class provides differing levels of compute power, network, and memory capacity]
Allocated Size [Choose the correct amount of storage space you want for your replication instance. AWS DMS uses this storage for log files and cached transactions while replication tasks are in progress]
VPC [Choose an Amazon Virtual Private Cloud (VPC) where your replication instance should run]
Multi AZ [The Multi-AZ option deploys a primary replication instance in one Availability Zone (AZ) and a standby in another AZ. The Single-AZ option deploys a single replication instance in one AZ. Billing is based on DMS pricing.]
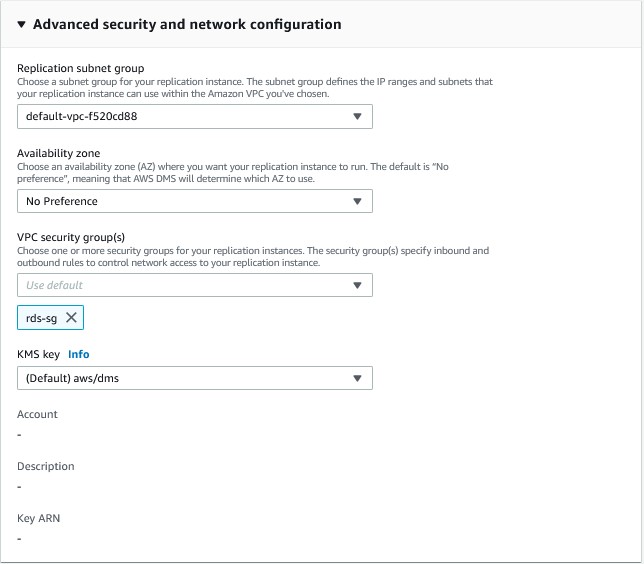
On Advanced security and network configuration:
Replication subnet group
Choose a subnet group for your replication instance. The subnet group defines the IP ranges and subnets that your replication instance can use within the Amazon VPC you’ve chosen.
Availability zone
Choose an availability zone (AZ) where you want your replication instance to run. The default is “No preference”, meaning that AWS DMS will determine which AZ to use.
VPC security group(s)
Choose one or more security groups for your replication instances. The security group(s) specify inbound and outbound rules to control network access to your replication instance.
Maintenance
Periodically, AWS DMS performs maintenance activities, such as updates to the AWS DMS engine software and operating system on your replication instance. You can then choose when these maintenance activities occur.
We can keep this as default as it is not going to make any changes.
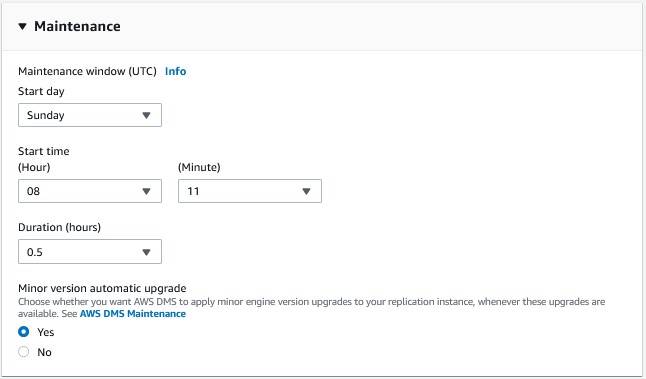
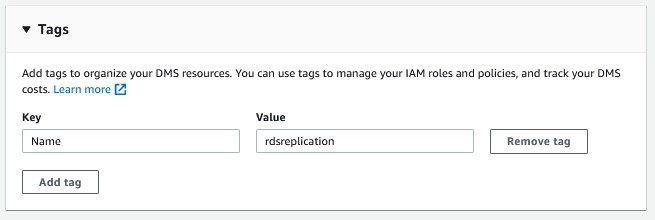
Once all the required parameter values are placed, the next step is to create a replication instance by clicking on “Create”
It will take some time to create replication instances

The next step involves adding inbound rules on the security groups
On both EC2 Postgres and RDS Postgres security group we need to add an inbound rule to the Replication instance for internal communication.


The next step involves creating various endpoints as well. Simply go to Endpoints and “Create endpoints”
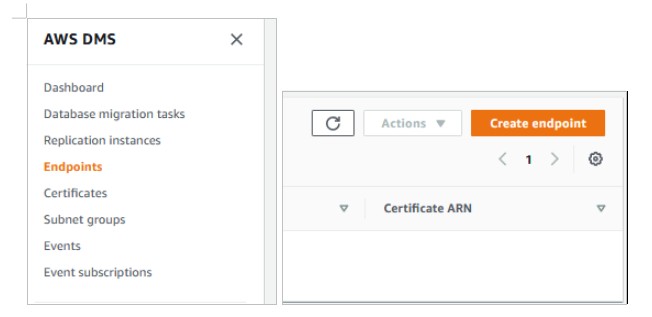
On the home screen you will get an endpoint type. You can select whether this endpoint will be used as a Source or a Target. A replication server will have multiple endpoints of each type.
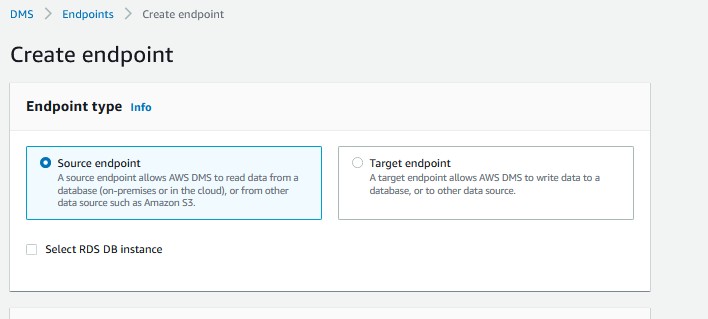
Source endpoint: To read data from EC2 Postgres
Target endpoint: To write data into RDS Postgres
On both endpoints, we need to define endpoint configuration details based on our needs. We are migrating our data from E2Postgres to RDS Postgres.
Let’s fill out the required details for Source endpoint first…
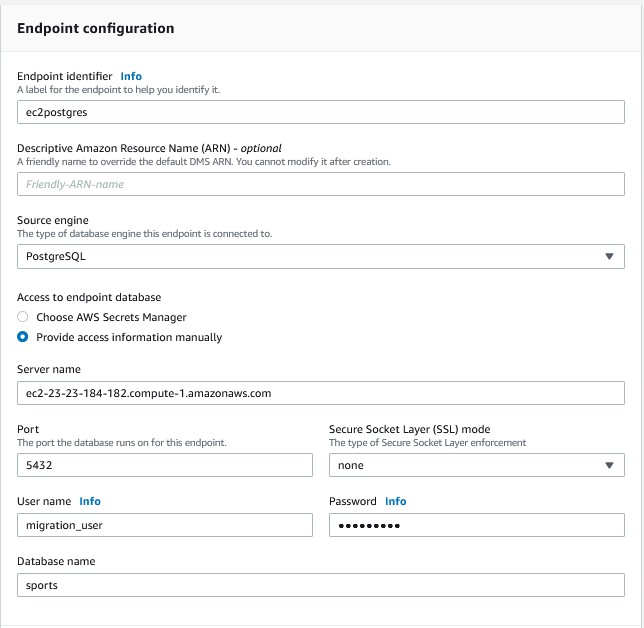
Endpoint identifier – A label for the endpoint can help you effectively identify it. It would be unique for all replication instances that are owned by your AWS account in the current region.
Source engine – There are different types of database engines that the endpoint would need to connect with. In this case it would be Postgres.
Access to the endpoint database – AWS Secrets Manager has two options and we can simply provide our endpoint database details manually. We would not be using a secret manager as we would be providing the server related information manually.
Here are the steps on how to get started
Server name – Fill out your EC2 Postgres Instance name
Port – Select default port
Username – Allow the username with all the permissions which are required in allowing the data migration.
Password – If you have special characters in your password (e.g. + or &), you will enclose the entire password in curly brackets.
Database – The database name will need to migrate by using the sports database that is already deployed on the EC2 Postgres instance.
We can ignore the rest of the options and move on to the testing part of the things.
We can test our endpoint here to make sure we have configured it correctly
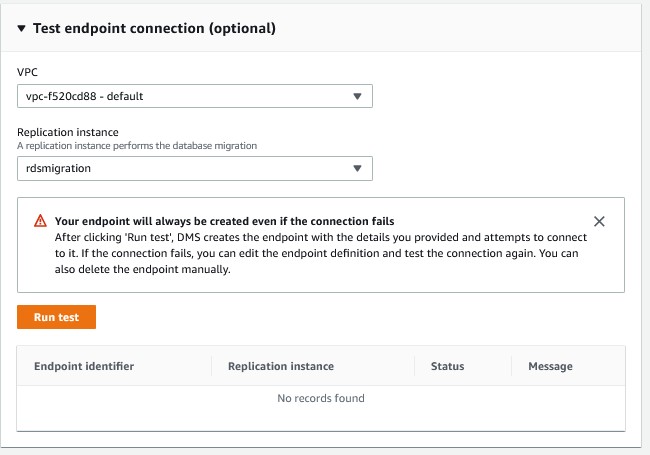

Next step will configure Target endpoint…
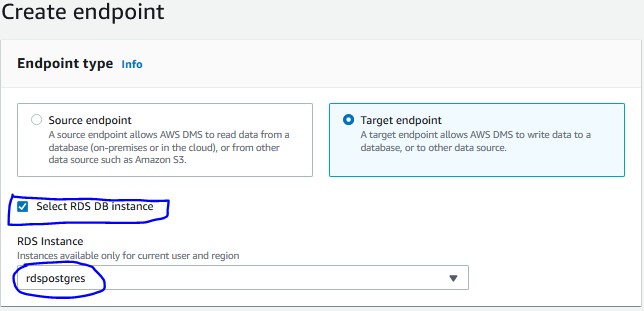
Since we are migrating our database into RDS We can select RDS Instance option on Target Endpoint, in the Drop down will get our rds postgres instance
The target engine is Postgres and it provides access to the endpoint database – It has two options: AWS Secrets Manager and we can provide our endpoint database details manually. Since we are not using a secret manager we can give out an additional source.
The server related information will be filled up automatically based on rdspostgres instance with certain details:
Server name – rdspostgres instance
Port – 5432
Postgres will be the default username.
The password for the account will be the same password which we have provided during our RDS Instance creation. If you have special characters in your password it is important to enclose the entire password in curly braces.
Database – We need to create target database manually on our Rdspostgres Instance…[ We can help create this empty database using ssh or any client tool]

Let’s test out Target endpoint connection:
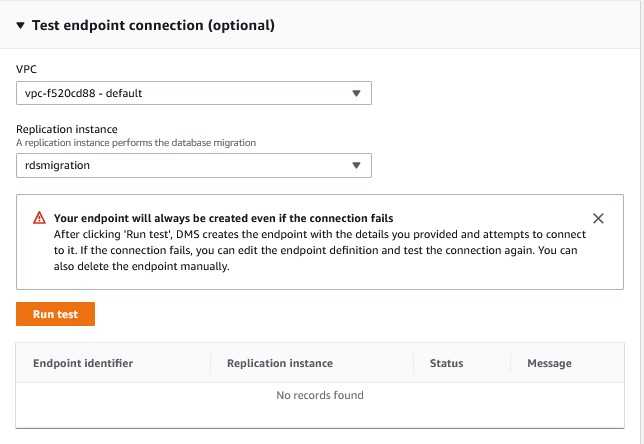

Next Step to Create Database migration tasks
On a DMS task we can configure the databases and collections that we want to migrate. We can specify tables and schemas here for the migration.
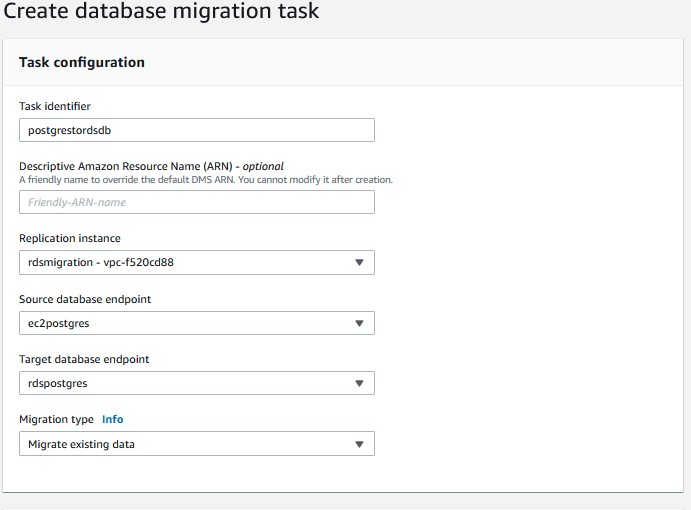
- Task identifier: postgrestordsdb
- Replication instance: rdsmigration [Our migration replication instance]
- Source database endpoint: ec2postgres [EC2 Postgres Instance name]
- Target database endpoint: rdspostgres [rdspostgres Instance name]
- Migration type: From the three types of existing migration there are different methods available
- Migrate existing data – Performed a one-time migration from the source endpoint as the target endpoint.
- Migrate existing data and replicate ongoing changes – Performed a one-time migration from the source to the target, and then continued replicating data changes from the source to the target.
- Replicate data changes only – Not just performing a one-time migration but continuing to replicate data changes from the source to the target.
On the Task Settings
Choose this setting if you want AWS DMS to compare the data at the source and the target.
Enabling CloudWatch logs will be charged at standard rates.
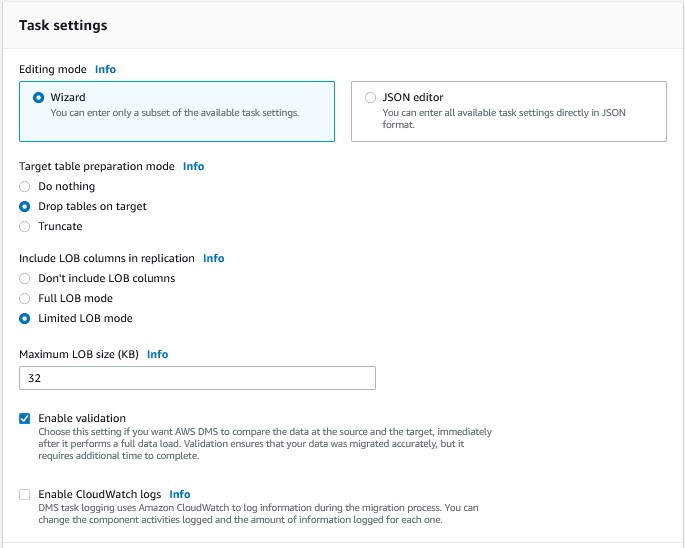
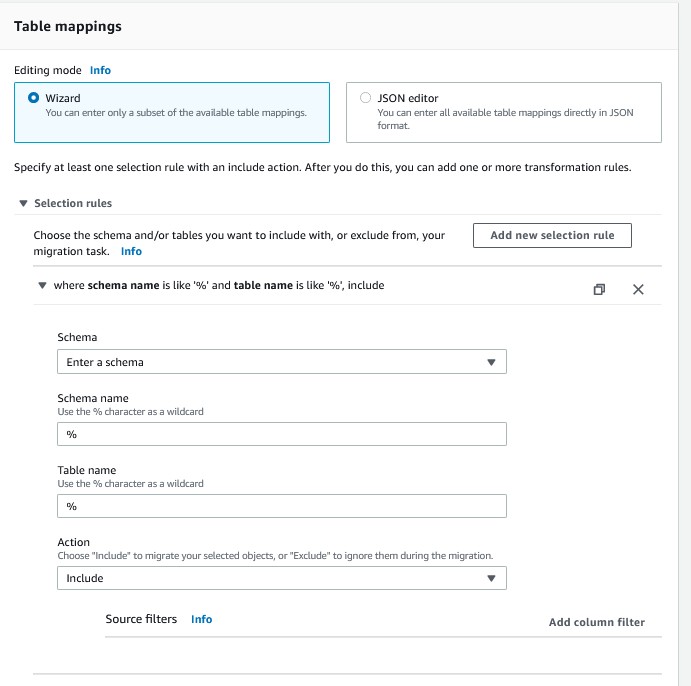
Table mappings
Here we can place our rules for schema and table inclusion and exclusion., We must mention a one task minimum otherwise the task will not be created.
To make it easier we are giving out rule to create all schemas and tables
Pre Migration assessment
A pre migration assessment helps you with potential migration issues before starting your database migration task. You can store the assessment reports into the S3 Bucket by enabling it for the future.
Once all the tasks are placed, click on “Create Task” as it will help you execute your task immediately especially if you have selected “Automatically on create”

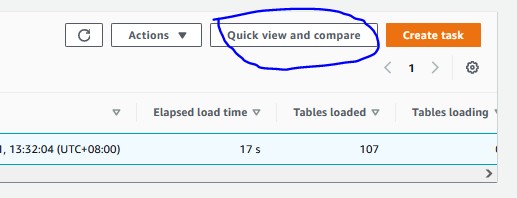
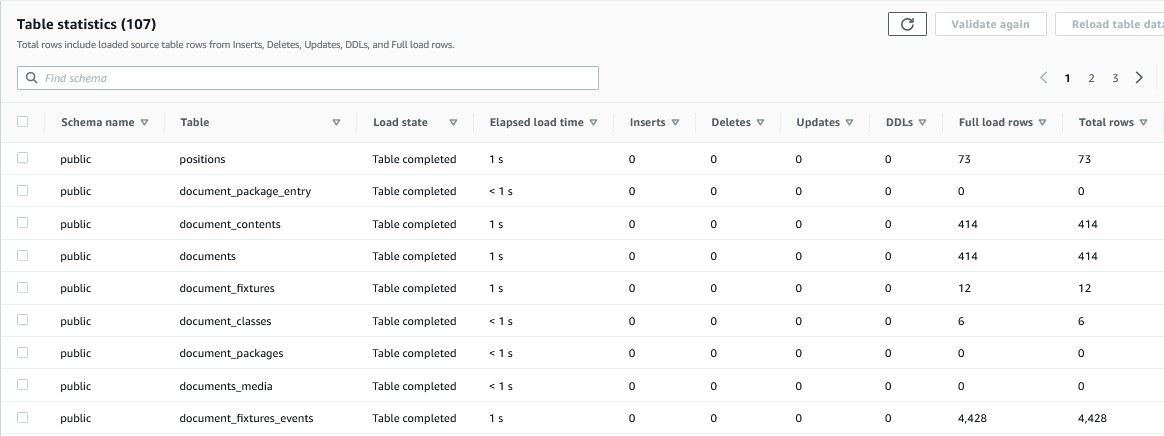
After data loading is completed, we can validate the loads on “Quick view and compare”, Table statistics will provide complete details on table level total rows and loaded rows.
Summary
In this article we have covered in high level how to migrate a postgres database running on EC2 to AWS RDS Database using the DMS tool by creating replication instances along with end points and DMS Task. On post migration we have validated the row counts on source and target databases. Thus, we have successfully completed a migration to Postgres.


